Showing posts with label Scrap-busters. Show all posts

Tuesday, February 20, 2024

Half-Square Triangle Sewing Basket

I decided I needed to see my dining table ~as a dining table!  It's covered in sewing paraphernalia, and I watched myself struggle to find my scissors, or seam ripper, or little 4-1/2" ruler... Maybe you know of what I speak.  Anyway, as I was cleaning, a brainstorm hit (or maybe it was just ADHD!) It started like this...


Left over half-square triangles... that I really like, and I've loved baskets since forever. not sure where the black ribbon came from??
Ohh... I should really use those HST's for something.  I really like them!  Oh what if I lined the basket with them and kept my sewing stuff in it??  Oh that would be cool.  [All my sewing stuff is out on my dining table and the ironing board is still up... actually the iron is hot and ready!]   
So I blew off cleaning up my mess for a while longer while I listened to the little horned guy on my shoulder.. and got busy with my new creation.

I made enough of the HST's with black as one side, then pink & white homespun type plaid, or my b/w gingham with the flowers on it on the other side, and made a zig-zag pattern that went all around the inside of the basket.

I did it the easy way... two 5-1/2 inch squares of fabric sewn right sides together around the OUTSIDE edges of the fabric; and then I cut those pieces from corner to corner (X) so I ended up with four HST's...  I really love this method.  So quick and easy.

I figured I would make a bottom piece to match, and put some toweling or something underneath to make it a bit softer...  


And then it happened... another brainstorm hit.  (Actually I love when this happens..)  I have two black (can you believe it?) dish cloths, brand new... well never been used anyway, from the dollar store... so I 'spent' 50 cents.  


If you peek on the sides of the basket (above) you can see the construction.
I centered the folds and pinned to follow the curve of the basket, and smoothed it out a bit by using the appropriate sized dish (put upside down on the fabric corners) for my rotary cutter to follow.  My dish cloths had a mesh backing, so I could either peel it off and not use it, or leave it on the dish cloth and use it.  I left it, [it was a bit stiff, and helped the dish cloth keep it's shape--like interfacing would].  I stitched around the edge of the mesh to hold it in place, since I just cut away the serged edges that were holding it in place.  I quartered my HST strip and pinned it to the dish cloth, and stitched a 1/4" seam so that it would work with my 'quilt pieces'.   

I had a few ideas for making pockets for the outside of the basket, and making the basket liner reversible,  but 'simple is better' won out.  I finished the edges with strips of black fabric (people must think everything in my house is black!  lol) added a piece of ribbon on all four quarters to tie it in place.  I love it.


Now I'll be able to find my tools in style  :D
I guess it's back to finding the dining room table again!  Wish me luck!


Saturday, February 17, 2024

What's In the Bag?


My sister Rose has an embroidery business.  CB Designs, in Arvada, CO.  She has a beautiful machine that stitches out 10 different colors automatically, and she embroiders mainly for businesses (hats, gear, t-shirts, aprons... whatever).  But when WE get together she is all excited about the fun stuff there is to embroider and we test it out.

  
I like tree frogs.  And I'm not the only one in the family that does. So when Rose found this tree frog pattern... well we HAD to stitch it out.  The only thing she had though (since she doesn't sew) was a scrap T-shirt from one of the rejects of a print job they did.  Bright goldenrod.  The frog literally took an hour to stitch out (57,000 stitches I think), we used 14 colors.  I could not bear to let it sit on a t-shirt that would never be worn... SO I made a drawstring bag out of it.  Everything I used was already on hand.  The blue fabric was from my inventory stash.  Even the drawstring was pulled out of a pair of drawstring pants I don't wear.   I didn't use a pattern, I just made it up.  It was a bit nautical in theme since it was for my granddaughter in Florida who goes boating and plays on the beach a lot. 


And the ultimate recycling kicker is that I put an empty plastic coffee container on the inside.  The coffee can keeps the bag's shape, and keeps my granddaughter's treasures and treats clean, dry and sand-free on their frequent boating outings in Florida where they live.  Even the blue fabric is a wave print!  I love it when a plan comes together!  :D


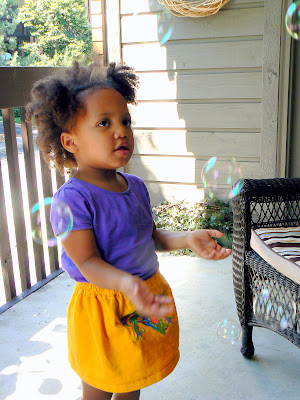
OH! There's more!  Rose stitched out two of these frogs (two granddaughters remember?).  So the other T-shirt was recycled into a cute little skirt.  Unfortunately the frog is sideways, but hey... I can't even guess how much $$ in thread (57,000 stitches!!) there is in this frog!   Take a look:


Tree Frogs are my favorite!
Isn't she lovely?

For this simple little skirt I just cut the t-shirt across the chest, just under the arm-pits with a rotary cutter.  I folded over the raw edge to make the casing to fit the 3/4" elastic I had on hand, and I was done!  I left the hem of the t-shirt as is, and it's the hem of the skirt.  


Easy and easy care!


Wednesday, May 9, 2012

Flip-Flop Market Skirt

I promised to post the market skirt I finished over the weekend.  I should put "finished" in quotes... I think I'm going to add another layer of ruffles... somehow this one seems a bit shorter than I imagine my little granddaughter would be wearing now.  Hopefully I'll be able to see her (and her parents) soon...  I miss them oodles.


I'm not sure if I explained before... but I've been using up some pretty ancient stash to make these market skirts.  I love this light blue fabric, and I've been using it up.  However, there was a spot or two on the cuts for this market skirt, and I thought it wouldn't show after I got it together.  Wrong.  So I thought about pockets for a minute, and I remembered seeing some cute outfits with flip flops on the bottom of them, like a border.  I decided to give that a shot.  My son drew a flip flop shape for me, and I proceeded to cut out the shapes with my scallop shears...


I stacked the print and the blue solid, and basted the shapes onto the skirt with a machine basting stitch.  Next was outlining the shape with yellow embroidery thread, using my machine's blanket stitch (it could have been any stitch) to give the flop some shape.


Next was the fun part..  making the toe sling (or whatever you call the part that goes between the toes).


I have an assortment of trims I picked up at a sale..with the g-baby girls in mind, and one was blue sequins.  Normally I "save" this for some undetermined occasion and never use it... hence my stash!  This time I brought out the 'bling'.  I could have just stitched it down, but being playful with it paid off.


This is the length of trim I was working with.
I centered the trim across the foot, where I thought the toe-piece should go.

I used the button stitch on my machine (a zig-zag stitch set a zero length works too) and
 placed a straight pin over the top of my presser foot to sort of create
a 'shank' where the toe piece would be.


Here is a closer view of what I mean.


another view


After that, I removed the basting stitch and added another row of blanket stitches (this time in blue) to give the flip-flop
a little more ump and secure the outside ends of the sequin trim.


I AM seriously considering adding another ruffle to the bottom of this skirt.  I'm out of the cute yellow and blue fabric, I may have enough of the blue for another ruffle for the bottom... maybe I'll add some more bling... (or should I save the trim for something else???)  heh heh


UPDATE:  I did.. I did add another ruffle in co-coordinating fabric.