My daughter requested I get busy and give her this outfit I created a few months ago for my granddaughter. ...Have I mentioned what a procrastinator I am?
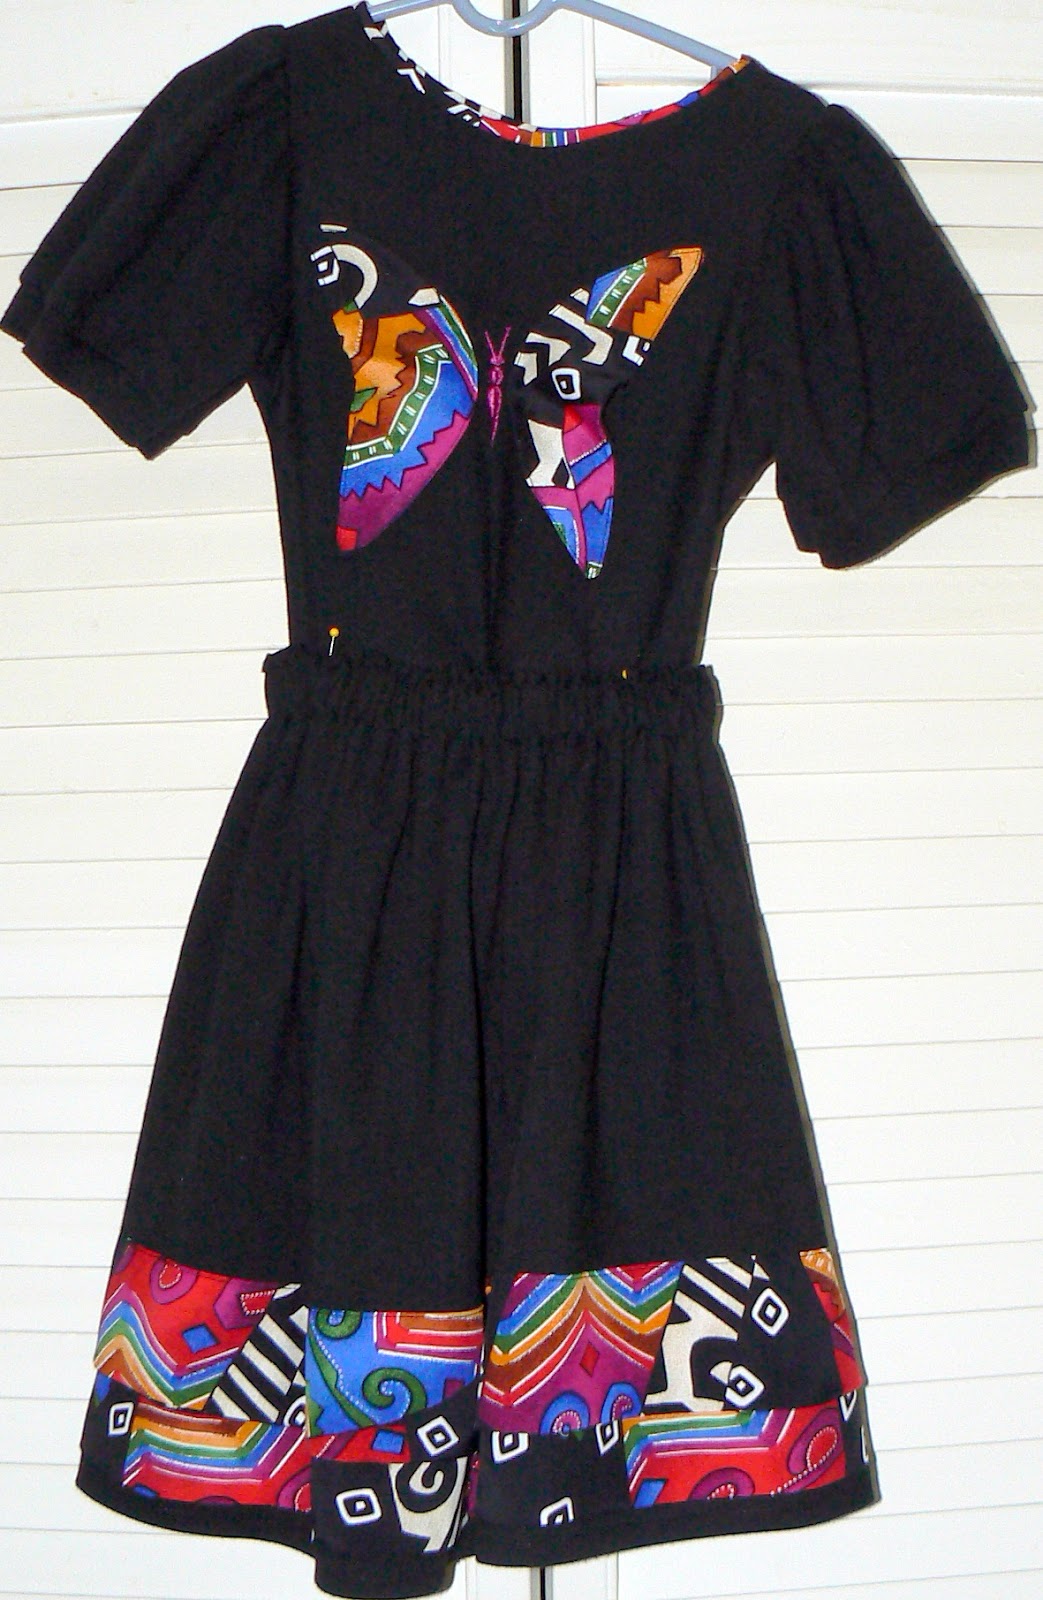
I thought I'd show you what I made with my son's work polo's. The polo's were fabulous, in great shape, but had his former job's logo on it. And he didn't want to wear them anymore.... so I took two of them (one for the top and one for the skirt) and made this outfit:

This is the top and skirt together. I don't have tutorial pics (sorry~I wasn't thinking of blogging when I made this) But I can try to tell you how I did it.
The skirt was made by cutting the polo just underneath the armpits and across the body of the shirt. ~Rotary cutter and ruler work well here. I had to keep in mind where the logo was on the back of the polo, you might too if you are recycling. So basically I had two finished side seams, a finished polo hem and one raw edge to work with. All you'd really need to do is sew a casing at the top and insert elastic and you would have a finished skirt. VERY easy! But I wanted to add something since it was all black, and this was for my 3yo granddaughter.

I went through my stash and found this wild print. (Don't ask me what I had in mind to make when I bought it, I don't even remember!) But I did think it would brighten up the skirt and be fun for my granddaughter. I intended to make ruffles. But gathering this length of fabric seemed like too much trouble at the time, so I cut two strips 6" wide and long enough to go all the way around the skirt. For each strip I folded them long-ways right sides together, stitching 1/4" away from the raw edges forming a tube. I turned the tube right side out and pressed. These strips became the fabric faux ruffles at the bottom of the skirt. The bottom strip was placed so about an inch of the black hem showed below it, and then I sewed the upper strip/faux ruffle so there was maybe a 2 inch overlap but you could still tell there were two pieces. The
finished hem of the polo shirt became the finished hem of the skirt.
I made the elastic casing by folding over and pressing 1 1/2-2 inches of the top edge of the skirt. *I want to share this trick for making tight casings: I top-stitched 1/4 inch from the pressed fold all the way around the skirt. Then I took my length of 1" wide elastic (safety-pinned together), and laid it flat against the stitching inside the casing. I changed my presser foot to the zipper foot, laid the casing over the elastic, and sewed the casing closed with the zipper foot as snug against the lower edge of the elastic as I could (without stitching through the elastic). You will have to manipulate the elastic as you progress around the skirt. It helps if you keep track of where the safety pin is, so you don't enclose it in the casing. If you aren't sure about the waistline measurement, you can still leave a two-inch opening in the casing to be able to adjust the fit if necessary, before you overlap the ends of the elastic and zigzag them together. Remove the safety pin and complete the top-stitching to close the casing. I like this method because it keeps your stitching straight, you know you have enough room for the elastic, and it gives a nice professional looking finish.
 |
| (click to enlarge)
|
Now for the Top!
 |
| (click to enlarge) |
I have a tank top pattern out of t-shirt fabric that fits my granddaughter. (I didn't make anything out of it because there was a spot on the fabric... so I use it for a top pattern~ I used the same top pattern when I cut out the Sparkly T with the matching leggings). I cut 2 of the tank pattern pieces out of a second polo shirt, to make the front and back of the top. I sewed those right sides together at the shoulder seams. I then cut the sleeves from the polo shirt. I was going to size them down, but I thought 'what a waste!' ... So I gathered the sleeves to fit the armseye of the tank. I even used the band on the bottom of the sleeve to keep that ready-made look. I sewed the side seams from the underside of the sleeves around the armpit area and down the side seams. It made nice puffy sleeves! Then I hemmed the bottom of the shirt by folding and pressing the hem and sewing it with twin needles, encasing the raw edge with the zig-zag stitch that forms on the underside of the stitch, (a double row of stitching works well too, to keep that polo finish look)
 |
| (click to enlarge)
|
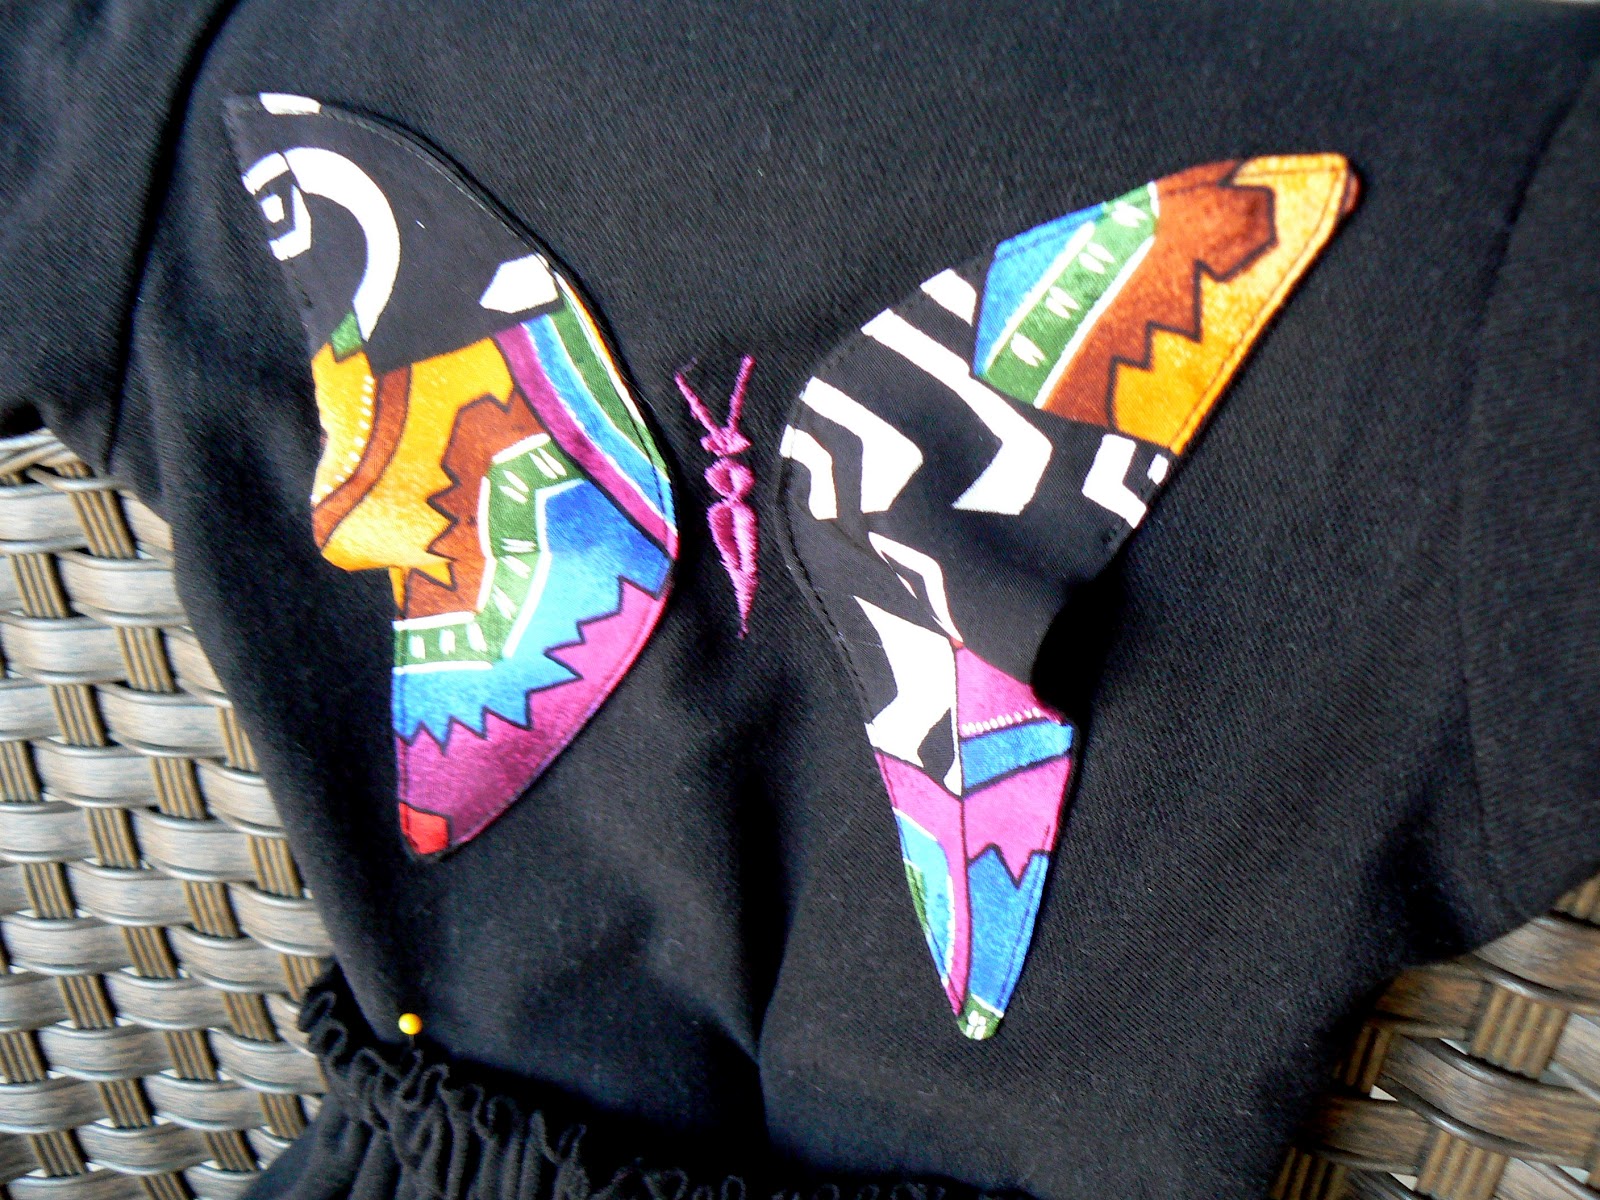
Now for the Butterfly... This was a happy bit of inspiration. I had scraps of this fabric on my cutting table. Somehow I ended up with two half-circles. The fabric is light and kind of 'floaty' and when scrunched a bit the half circles reminded me of wings... butterfly wings, so I went with it. I cut a backing of the black T fabric the same size, sewed them right sides together ~leaving a 2 inch opening for turning, and turned the fabric right sides out again, pressed it and top-stitched close to the edge, stitching the opening closed in the process. I had two half-moons. I played with the placement before I realized if I sewed down the round sides facing the middle they became the wings, and if I left part of the half circle unattached to the front of the shirt they had a bit of movement to them. Just what I wanted! [If you notice the half-moons don't look like half-moons because I placed the top and bottom corners so that the strait sides 'buckled' or opened up a bit to give that flutter affect.
My machine has some embroidery stitches, not like my sister's super-duper model, but I experimented on my scraps and came up with a butterfly body that looked OK. I used a dryer sheet for the backing on the inside of the shirt (which tears away easily when you're done) and I had a decent looking modern-art monarch! hehe This was really exciting. I love it when a plan comes together. [If you use your machine embroidery stitches I recommend practicing on scraps until you are confident you will get it right on the top! Picking out embroidery stitches is NO fun!]
 |
| (click to enlarge)
|
The only part I wasn't really happy with was the neckline. I finished it with the woven fabric, for another bit of color, but I probably should have stuck with t-shirt fabric, or a much larger neck opening, or even tried to use the knit collar from my son's polo... (the woven fabric didn't allow the neckline to stretch, and we couldn't get the top over my g-baby's head!) So that's why she's not wearing it yet, and what I need to work on next so she can wear it. My daughter loves it, and keeps bugging me about finishing it. So I will this weekend.
The best part???....this outfit didn't cost a dime!
Now couldn't you imagine some bright colored polo's, striped even, or tie-dyed shirts ready to be recycled into cute skirts/tops with accents in sweet spring/summer prints?
Speaking of tie-dye... buy some extra egg-dying kits (after easter sales) for a tie-dye project. It works really well! My youngest daughter (now a mother herself) did a tie-dye project in pre-school with easter egg dyes on T-shirts. Too much fun!
And here it is being modeled by my beautiful and precocious granddaughter...
I asked her mom what happened to the top, and she said Lele was playing with chalk when she said "OK Lele, ready to take a picture?" and Lele put down the chalk, wiped her hands off on her shirt, and said "Ready Mommy". This kid cracks me up! I (heart) her so much!