

July BOM is the Dresden Plate... I'm just going to put up pics of my renditions, and add more info a bit later. Happy Saturday!


 |
For 2 pockets I cut 2 front pieces (floral) and 2 lining pieces 6" square. The size is arbitrary, but easy to cut with my 6 x 24 ruler. Actually I think the original pocket was closer to 7"x6", because it ended up a tad bit wider and more gathering at the top (making it look almost circular).
|
 |
The two front pieces were "fussy cut" to match.
|
 |
I rounded off the bottom corners using a coffee cup my mom gave me.
(notice the caption?) |
 |
All bottom corners are rounded.
|
 |
If you wonder why I am using 1" casings...
well, I have a LOT of 3/4" wide elastic! |
 |
For the casing I measured 1-1/2" down from the top of the pocket and marked with a pin, pinning again another 1" down. These pins mark the openings for the casing. You don't want to stitch between the pins for this step.
|
 |
I stitched a 1/4" approximately from the pocket edge, all the way around, leaving the 1" openings on either side for the casings.
Now I have not seen this little trick on any blogs I've read so far, so this may be an old school method, and possibly new to you...
when leaving an opening for turning, rather than back stitching, pivot and continue the stitching to the edge of the fabric/seam allowance.
It's great for added strength, but the sweet part is, the opening is nearly invisible after turning and looks very finished. Try this on the next item you have to turn.. like pillows, etc!
|


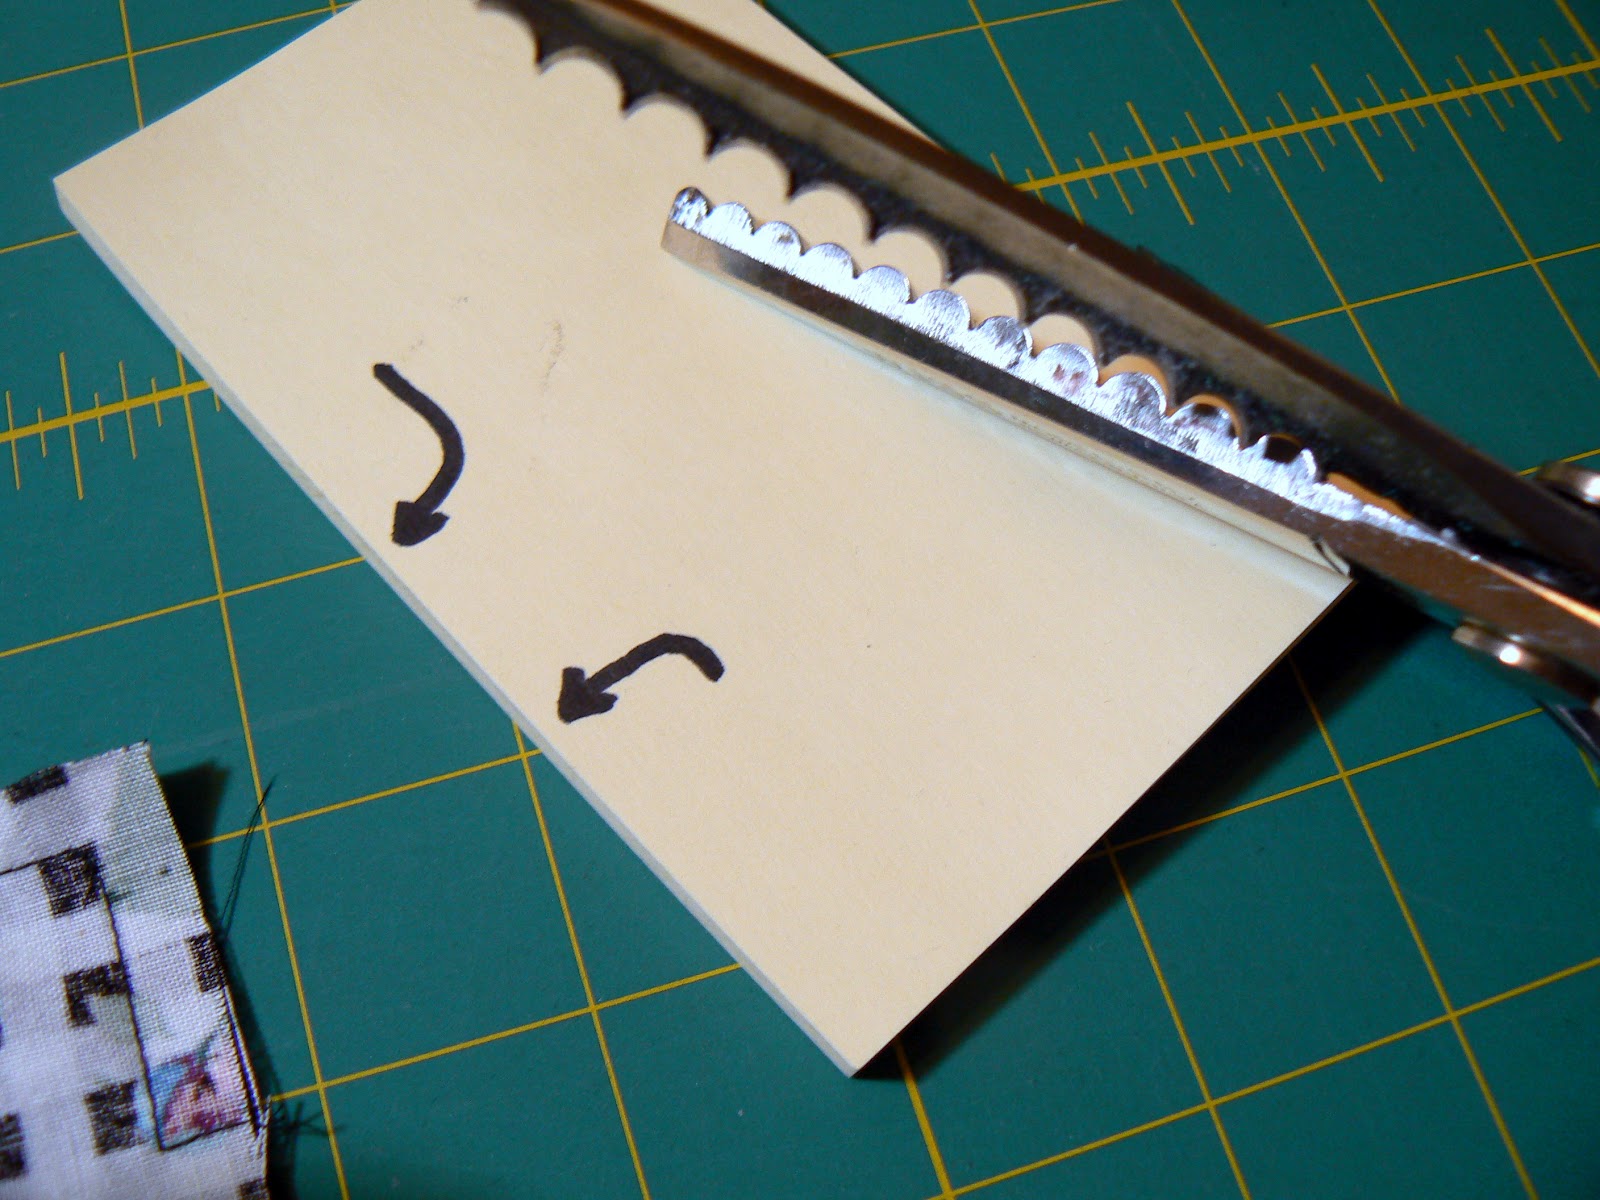 |
These are my scalloping shears... a gift from a wonderful seamstress friend, that lost her eyesight. I will always cherish these. If you have a pair you can use them for trimming corners and curves!! Pinking shears or regular shears work as well. (please.. ignore the sticky note with the arrows.. it doesn't apply here)
|
 |
Great for corners
(note that I took a diagonal stitch at the corner.. helps to make crisp corners once the fabric is turned to the right side)
|
 |
Close to the thread, but don't clip your sewing!
|
 |
Extra sweet for trimming curves!
|
 |
Press your stitching before turning. It sets the seam and makes for neat pockets. (time to wash the ironing board cover again)
Next I'm going to use one of the openings to turn the pocket right side out. |
 |
This is a tube turner. I think the brand name is Fasturn. I'm not sure if people still use them, but they are worth their weight in gold! I've had these forever, so I'm sure sure what method I'd use if I didn't. You might try Eleanor Burns, of Quilt in a Day's method of using a large drinking straw with a ball-point bodkin.. or possibly using the eraser side of a pencil to push it through the opening would work too. Or, you could have a 3rd opening ~at the top of the pocket and forgo the hassle ~ just remember my stitching tip for that opening too~ If you have a nifty method... please share!
|
 |
Insert the tube through the opening to the far corner of the pocket.
|
 |
Insert the wire (with the corkscrew end) into the tube and twirl the handle to the right to work through the fabric. (Righty-tighty ~ Lefty-loosy)
|
 |
The corkscrew is small/fine enough to go through the fabric without damaging it. (I wouldn't try this with expensive or easily snagged fabric though ~like silk or satin!)
|
 |
Gently pull the wire (with fabric) back into the tube. In this instance you aren't trying to pull the whole pocket through the tube (you would do that for tubes or narrow ties).....
|
 |
Just enough to be able to be able to pull the fabric with the tube turner, back out of the casing opening. Carefully turn the handle on the wire (to the left) to release it from the fabric. Then pull the pocket right side out. Easy-peasy!
|
 |
This is how the pocket looked freshly turned. I usually have a chopstick around to poke out the corners, but hey, use what you got! This paintbrush handle worked just fine.
|
 |
Poke the corners out as much as possible without poking through your fabric, and work the round corners so they are nice and smooth.
|
 |
See what I mean about the opening? It's strong! And good thing, because turning fabric adds stress on the stitching there.
|
 |
Look how nice it looks after a good pressing!
|
 |
Here is the pressed pocket.
Now to add the casing and the elastic.
|
 |
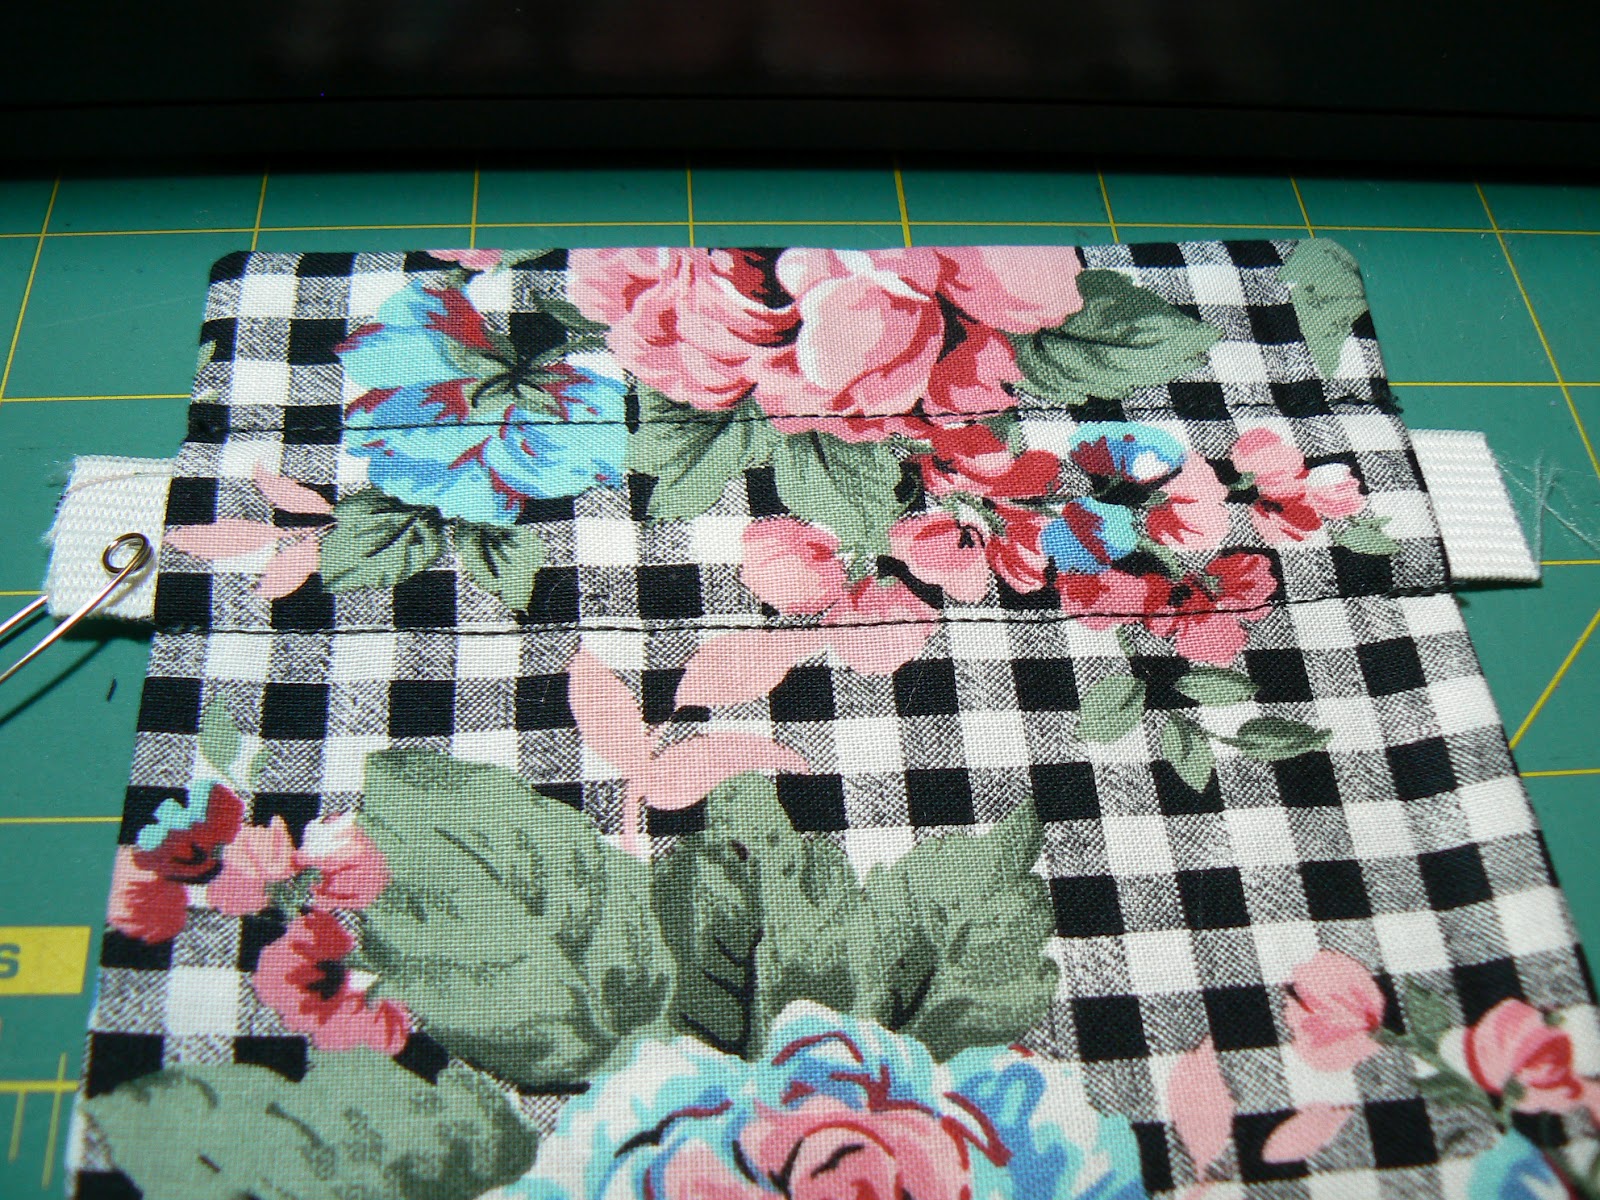
I double checked the measurement for the opening of the casing, and stitched 1" from the top of the pocket,...
|
 |
And then again, 1" below that stitching. Sometimes it helps to have a spot on your sewing machine throat plate to use as a guide for straight stitching. I'm using the far right of the metal part of my throat plate in this instance. Or you could use your preferred way to temporarily mark the fabric.
|
 |
Six inch lengths of elastic were cut for each pocket.
|
 |
Since we are gathering the pocket, and eventually cutting off the excess, 6 inches is more than enough.
|
 |
Thought you might like to see the back of the pocket... !
|
 |
Mark the center of the elastic... and then mark where you are going to eventually cut the elastic (equal distances from the center mark). If you want more gathers in the pocket, then you will mark your cutting line closer to the center line. At this point you can play with it to see how you like the look the elastic creates. I mark the elastic identically on both elastic pieces so matching pockets actually match!
|
 |
Put the elastic through the casing with the extra on each side.
|
 |
Line up your cutting line right next to the edge of the pocket, and pin the elastic in place. You might want to pin further than I have, to allow you to stitch the elastic in place without removing the pin, to prevent the elastic from shifting. Then stitch/double-stitch the elastic in place ~just stitch the casing area for this step. (1/4" seam is good, or however wide a seam you will be using when you top-stitch your pocket onto the skirt).
|
 |
Here's another view of the back side of the pocket.
|
 |
You can see your cutting line when you tug on the elastic after stitching it in place. So when you DO cut the elastic, it won't be visible.
|
 |
I pushed the gathers to the center of the pocket to give me some stitching room to sew down the elastic. (Sorry, I should have trimmed my threads before taking this picture. Looks a bit messy!)
|
 |
And there you have it.... a finished, lined pocket! ready to be top-stitched onto your market skirt. Once your pocket is stitched onto the skirt, you can take out the pins and distribute the gathers evenly.
As far as placement on the skirt, determine where the center front is on the skirt body. Eyeball how far you think the pockets should be from the center, or measure half-way between the center front and the sides. Give enough room on the top and bottom for your waistband and ruffle seams, pin in place. Top-stitch as close to the edge as you like (stitching over your previous stitching on the elastic casing) and reinforce your stitching at the top corners of the pockets for added strength. Then continue constructing the skirt as instructed in Dana's tutorial.
~*~
Please let me know if you have questions or suggestions about any of the steps. (This is my first tutorial). If you use my tutorial I'd like to know what you think, and how your project turned out. Hope you liked it.
|

 |
Here's my little twirling granddaughter & her daddy (my SIL) at the wedding last summer! The dress she's wearing is the inspiration for (and she's the recipient of) this particular market skirt! Can't wait to see her again~ hopefully next month!
hmmm... gingham on the bias! I'm making a mental note of that! :D
|
 |
Greek Cross
The black Kona is my background fabric; the floral fabric is from my stash.
The green chevron was my son Ricky's pick, from the Boho Fat Quarter Bundle by Free Spirit. I bought it at the start of the BOM, just in case
|
 |
Octagon Block
Kona in black for the background and one fat quarter of batik. Who doesn't love batik? I have received more feedback on this block...(and every other block that has batik in it). I think it's that 'glow factor' batik has.
I took daylight pics today ~ They turned out much better.
~*~
In other news, our family got to celebrate Raine's 30th birthday last Memorial Day weekend, because her wonderful hubby surprised her with plane tickets home to be with all of us!
We had a wonderful time with nearly all the family together, and a bunch of Raine & Ryans' friends. The volleyball net was set up in the park, and I even got in a volleyball game or two! There was swimming, barbecue, celebratory shots, and lots of love and laughter! It was fun! 
When I gave the halter top to my daughter for her birthday, I told her that I made a similar halter for myself 40 years ago (or more) from the very same pattern, and she loved it, and Ryan loved it. He actually liked the gingham side best...
I also gave her the Mug-rug to the Stars and gave Ryan a mug-rug I made for him with two bow-tie blocks... Ryan rocks bow ties (a lot) as you can see from their wedding pic above.
Hopefully they will be sending me pix as we didn't have time to take one of Ryan's mug-rug, or see the halter top on Raine.
My current WIP list include:
|
 |
| My kids... 23 years ago! Raelani, Raine, Robin RJ & Ricky (the twins) |
 |
| RJ & Ricky "the twins" today |
 |
| Four generations of smiling faces at Raine & Ryan's wedding last summer. Something to be said when your immediate family requires wide angle lens! |